Mini Cooper Paint Perfection: DIY Touch-Up Tips

.svg)


Why Your Mini Cooper's Paint Needs Special Attention
Mini Cooper paint repair has become a hot topic among owners, and for good reason. Modern Mini Coopers, especially F56 models, are notorious for having soft paint that chips and scratches easily. One frustrated owner reported their 2019 Mini Cooper with under 9,000 miles had an "appalling number" of stone chips on the bonnet - significantly more than their friend's 2009 Volvo with 90,000 miles.
Quick Mini Cooper Paint Repair Solutions:
- Small scratches: Use paint pens for precise application
- Stone chips: Apply brush bottles for better coverage
- Larger scuffs: Choose aerosol cans for even distribution
- Always use: Primer, base coat, and clear coat for lasting results
- Find your paint code: Check the driver's side door jamb or under the hood
The unique design of the Mini's bonnet and the switch to water-based, eco-friendly paints means your car is more vulnerable to road debris than older vehicles. But here's the good news: most paint damage can be fixed at home with the right supplies and technique.
Acting fast on paint chips isn't just about looks - it prevents rust from forming on exposed metal. Professional repairs can cost hundreds, but DIY touch-ups typically run under $50 and take just a few hours to complete.
Whether you're dealing with parking lot dings or highway stone chips, understanding your options helps you make the right choice for your Mini's needs and your budget.

Mini cooper paint repair helpful reading:
Your Complete Guide to Mini Cooper Paint Repair
Ready to tackle those annoying chips and scratches on your Mini? You're in the right place! There's something deeply satisfying about restoring your Mini's perfect finish yourself - plus it saves you a bundle compared to professional repairs. Let's walk through everything you need to know about Mini Cooper paint repair, from finding the exact right color to achieving that flawless factory look.
Finding Your Mini's Exact Color Match
Here's where many DIY paint jobs go wrong before they even start. You might think your Mini is "Chili Red," but here's the thing - Mini uses several variations of the same color name across different years and models. What looks identical to your eye could stick out like a sore thumb once it's on your car.
This is why your paint code is absolutely crucial. Think of it as your Mini's color fingerprint - a unique alphanumeric identifier that guarantees you get the exact shade that rolled off the BMW production line. Without it, you're basically playing automotive roulette with your paint job.
The paint code follows BMW's coding system, which means precision and consistency. Your Mini's paint code is typically found in one of three spots: the driver's side door jamb (check the sticker when you open the door), under the hood on the firewall or strut tower, or sometimes in the trunk area. Each location varies slightly depending on your Mini's year and model, so don't panic if the first spot comes up empty.

Once you've found that golden code, sourcing your paint becomes straightforward. Always look for automotive-grade paint specifically - never use household touch-up paint, no matter how close the color looks. The formulation is completely different and won't hold up to weather, UV rays, or car washes.
When ordering, double-check that code with your supplier. Computer screens can be deceiving when it comes to color, so rely on the code, not what you see on your monitor. If you're having trouble locating your paint code or need guidance on sourcing the right paint for your Mini, our team at Autowerkes knows these cars inside and out. We're always happy to help you steer the sometimes confusing world of Mini paint codes.
Choosing the Right Touch-Up Applicator
Now that you have your perfectly matched paint, let's talk tools. The applicator you choose can make or break your Mini Cooper paint repair job. It's like choosing the right brush for a painting - use the wrong one, and even the best paint won't give you professional results.
Paint pens are fantastic for fine scratches and hairline marks. They're precise, easy to control, and perfect for those tiny scratches that catch the light just wrong. The downside? They can apply paint too thinly for deeper chips, and you're limited by the small amount of paint they hold.
Bottles with brushes are the workhorses of touch-up repair. They're ideal for stone chips and slightly larger scratches because they give you better control over how much paint you're applying. You can build up thicker coats where needed, and they hold more paint than pens. The learning curve is steeper though - it takes practice to get smooth, even application with a brush.
Aerosol cans shine when you're dealing with larger scuffs or broader areas. They provide beautifully even coverage and work much faster than other methods. But they require careful masking to prevent overspray, and they're overkill for small, precise repairs.
For those tiny stone chips that seem to multiply on your Mini's bonnet, microdabbers are game-changers. These precision tools let you place just a tiny amount of paint exactly where you need it, creating virtually invisible repairs when used correctly.
Our technicians at Autowerkes typically recommend starting with a brush bottle for most Mini Cooper paint repair jobs. It gives you the versatility to handle both small chips and slightly larger scratches with good control. Add a fine-tip pen for hairline scratches, and you'll be equipped for 90% of the touch-up work your Mini might need.
The Step-by-Step DIY Mini Cooper Paint Repair Process
Time to roll up your sleeves! Don't worry - with patience and the right approach, you can achieve results that'll make you proud every time you look at your Mini. The secret is taking your time and not skipping steps, even when you're eager to see the finished result.

Surface preparation is where most DIY jobs succeed or fail. It might be tempting to jump straight to the fun part, but proper prep work is what separates amateur touch-ups from professional-looking repairs. Start by thoroughly washing the damaged area with car soap, then degrease it completely with automotive degreaser or rubbing alcohol on a microfiber cloth. Any contamination - dirt, wax, oils from your fingers - will prevent proper paint adhesion.
Next, gently sand any loose or raised paint edges around the chip with fine-grit sandpaper (2000-grit works well). If you spot any rust, remove it completely with a rust converter. This step prevents future rust from spreading under your new paint job.
Primer application comes next if you can see bare metal or plastic. This isn't optional - primer creates the foundation for everything that follows. Apply it thinly directly into the chip using a small brush or the applicator that comes with your primer. Let it dry completely according to the manufacturer's instructions, usually 15-30 minutes.
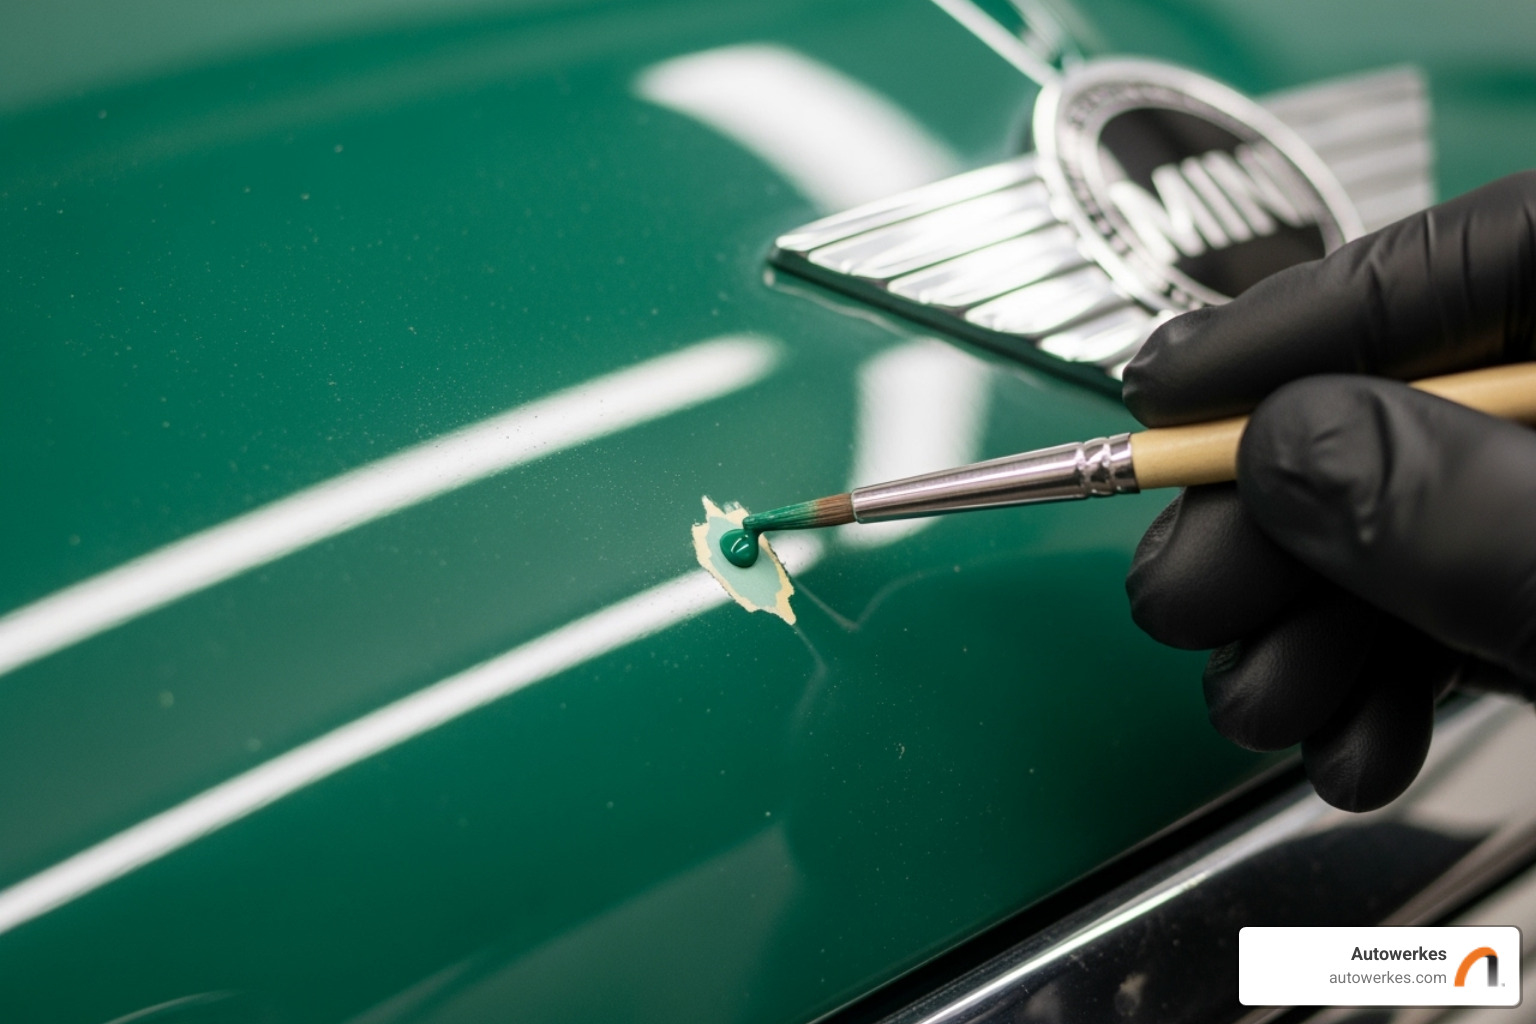
The base coat application requires patience above all else. Shake your paint thoroughly, then apply multiple thin layers rather than trying to fill the chip in one go. Dip your applicator, wipe off excess paint, and gently fill the lowest part of the chip first. Let each coat dry for 10-15 minutes before applying the next. You'll typically need 2-4 coats to build the paint up to the level of the surrounding surface.
Clear coat is your repair's armor and shine. Once your base coat is completely dry (give it several hours or even overnight), apply thin layers of clear coat over the repair. This protects your color from UV damage and helps blend the repair seamlessly with the surrounding paint. Allow full curing time - 24 hours to a few days depending on conditions - before washing or exposing the repair to harsh weather.
Special Considerations for Mini Owners
Your Mini isn't just any car, and its paint has some unique quirks you should know about. Modern Mini Coopers, especially F56 models, are notorious for having soft paint that seems to attract chips and scratches like a magnet. This isn't just bad luck - it's the reality of modern water-based paints that prioritize environmental friendliness over durability.
The Mini's distinctive bonnet design, while charming, acts like a stone chip collector. Its relatively flat, upright stance means it takes the full force of road debris kicked up by other vehicles. This explains why so many owners report an "appalling number" of stone chips even on low-mileage cars.
Here's something important about warranties: your Mini's paint warranty typically covers manufacturing defects like peeling or premature fading, but not damage from road debris. Stone chips, scratches, and similar damage are considered normal wear and tear. Don't expect warranty coverage for these issues - which makes learning Mini Cooper paint repair techniques even more valuable.
Sometimes DIY isn't the answer though. If you're dealing with deep scratches that go through multiple paint layers, large damaged areas, or peeling clear coat, it's time to consult professionals. These issues require specialized equipment and techniques that go beyond typical touch-up repair.
At Autowerkes, we've seen it all when it comes to Mini paint issues. We can help you determine whether a DIY approach will work or if your Mini needs professional attention. Our goal is always to help you make the most cost-effective choice for your situation.
Read our customer testimonials to see how we've helped other Mini owners keep their cars looking fantastic despite the challenges of modern paint and daily driving.
Achieving a Flawless Finish: DIY vs. Professional Repair
We've walked through the complete DIY Mini Cooper paint repair process together, and honestly, it's incredibly satisfying to fix those annoying chips and scratches yourself. For most minor paint issues - those pesky stone chips, small scratches, and everyday wear marks - rolling up your sleeves and tackling the job at home is both rewarding and budget-friendly.
But here's the thing: there's a sweet spot where DIY makes perfect sense, and beyond that, you're better off trusting the professionals. Think of it like cooking - you can whip up a fantastic pasta dinner at home, but attempting a five-course wedding cake might be biting off more than you can chew!
When to Skip the DIY and See a Professional
Sometimes the most skilled thing you can do is recognize when a job needs expert hands. We've seen plenty of well-intentioned DIY repairs that ended up costing more to fix than if they'd been done professionally from the start.
Deep scratches that go all the way to the metal are definitely professional territory. These aren't just surface-level issues - they need proper preparation, multiple product layers, and careful blending to avoid that obvious "repair patch" look. When you can see bare metal or plastic, it's time to step back.
Large damaged areas spanning several inches are another clear sign to call in the pros. Your touch-up pen or brush bottle simply can't cover that much ground smoothly. These repairs need spray application and expert blending techniques to look right. Imagine trying to paint a wall with a tiny artist's brush - you'd get the job done, but it wouldn't look great!
Peeling clear coat is particularly tricky because it usually signals a deeper problem. Maybe there was moisture trapped under the original paint, or a previous repair wasn't done properly. Either way, this kind of damage needs to be stripped down and rebuilt from the ground up.
And let's be honest - if your Mini's bonnet looks like it went through a hailstorm of stone chips, sometimes it makes more sense to have the whole area professionally addressed rather than spending hours dabbing individual spots.
The benefits of professional Mini Cooper paint repair at Autowerkes really shine in these complex situations. We use advanced color-matching technology that goes far beyond what's possible at home. Our technicians know exactly how to blend repairs so they disappear completely into the surrounding paint. Plus, we understand the quirks of Mini paint - those tricky color variations and the soft modern formulations that need special handling.

Protecting Your Mini Cooper Paint Repair and Finish
Once you've put all that effort into your Mini Cooper paint repair - whether you tackled it yourself or had us handle the tricky bits - protecting that beautiful finish becomes your next mission. After all, given how easily modern Mini paint chips and the way that adorable bonnet seems to attract road debris, a little prevention goes a long way.
Paint Protection Film (PPF) is honestly your best defense against future chips. This clear, tough film gets applied to high-impact areas like your bonnet, bumper, and side mirrors. Think of it as armor for your paint - it takes the hit so your actual finish doesn't have to. While it's an investment upfront, it can save you countless hours of future touch-up work.
Ceramic coatings won't stop stone chips, but they're fantastic for overall paint protection. They create an incredibly durable, slick surface that makes washing easier and provides excellent protection against environmental nasties like bird droppings, tree sap, and UV rays. Your Mini will stay glossy and vibrant longer.
Proper washing technique might sound basic, but it's crucial for protecting your repair work. Those automatic car washes with spinning brushes? Skip them. Instead, hand wash using the two-bucket method - one for soapy water, one for rinsing your wash mitt. This simple approach prevents those tiny swirl marks that can dull your finish over time.
Regular waxing adds another layer of protection and keeps your paint looking its best. A good quality wax or sealant every few months helps maintain that showroom shine and provides an extra barrier against the elements.
For expert advice on the best protection strategy for your specific Mini and driving conditions, our team at Autowerkes is here to help. We can recommend the right combination of PPF, ceramic coating, and maintenance products to keep your paint looking fantastic for years to come.
Ready to give your Mini the professional care it deserves? Whether you need expert paint repair or want to explore protection options, schedule your Mini Cooper auto repair appointment with us today. Our skilled technicians are passionate about keeping your Mini looking as distinctive and charming as the day you fell in love with it.